How to Do a Schema Markup Audit
April 8, 2023
Table of Contents
A full schema audit aims to ensure that your website has the most comprehensive schema types and corresponding attributes in place for your niche.
Schema markup is a vital tool for search engine optimization.
Structured data:
- Makes it easier for search engines to understand your content and index it properly.
- Can improve the appearance of your search results.
- Can help you rank higher in search results.
- Can help you appear in rich results.
A full schema audit should include a review of the following four key areas:
- All schema types being used on your website.
- Schema errors.
- A competitive SERP schema gap analysis.
- Implementation of fixes/new schema identified in steps 2 and 3.
How to get an inventory of schema types used on your website
Google Search Console
One of the easiest places to start is Google Search Console.
If you don’t have one yet, create an account here using the same login information you use for your Gmail or other Google services.
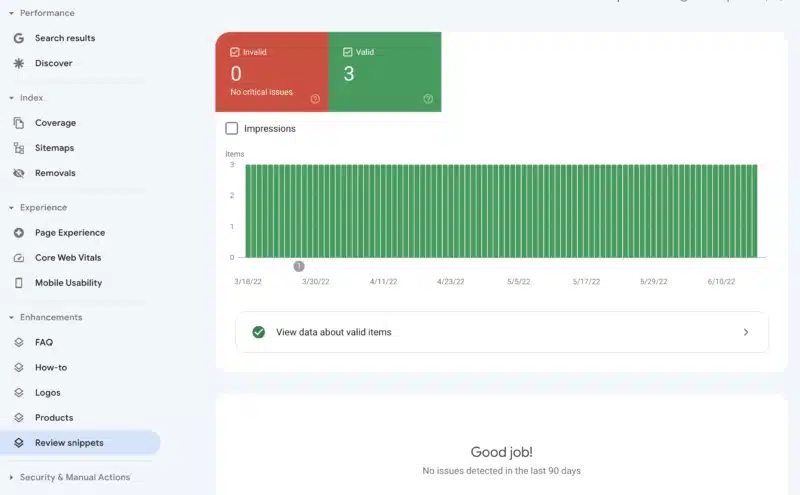
Once logged in, in the left navigation, scroll down until you see Enhancements.

You can then click through each enhancement to view valid pages that Google has identified with this specific markup.
What to look for
You’ll want to review the pages identified by Google. This could identify an area of the site where schema was not implemented.
For example, are there additional pages that utilize FAQs but are not represented in this list?
During this review, it is also a good idea to take note of any errors that Google identifies as invalid.

Sitebulb
While other tools offer schema insights during their crawls, I have found Sitebulb to provide a better output of that data.
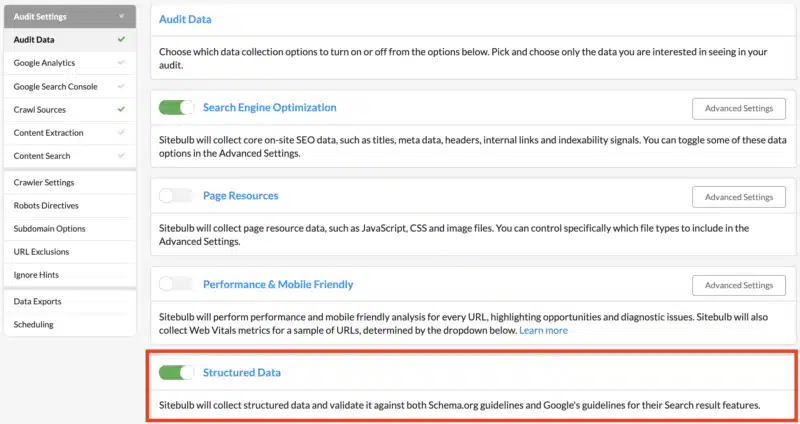
When starting your site crawl, ensure the Structured Data slider is selected in the Audit Data section. Select your other requirements and click Start Audit.
What to look for?
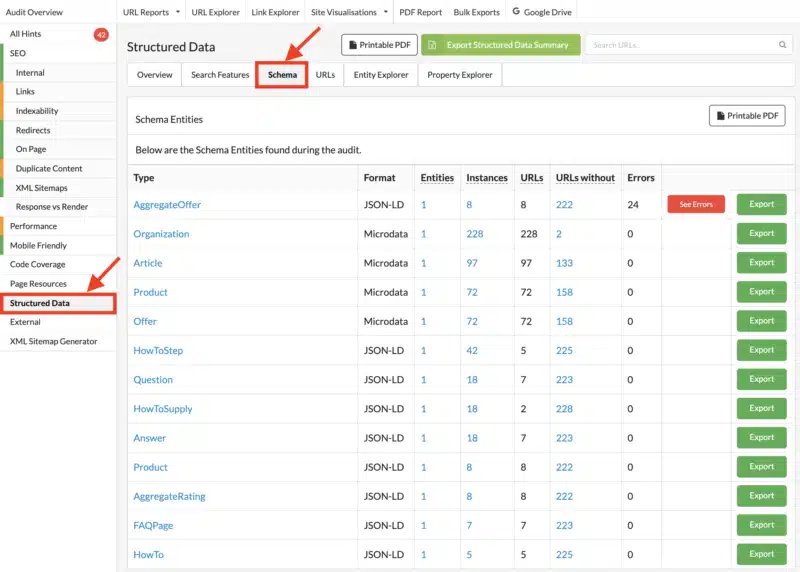
When the crawl finishes, under All Hints, select Structured Data.
The Overview tab will provide some excellent pie charts illustrating the number of URLs with/without schema, passed/failed validation, etc.
The Search Features tab will provide a list of schema implementations that affect search results.
This list should be similar to what you found in Google Search Console above.
What we’re primarily looking for, however, is on the Schema tab.
This is the complete list of schema types found on your site and should provide you a baseline to compare against your search competitors.
Reviewing your schema for errors
You could spend time looking through your site’s existing code on every page to see if any errors need fixing before moving ahead with further analysis.
However, the above steps should help identify any errors at scale and save you some time.
Google Search Console
Invalid errors will appear in red text in the console dashboard under each Enhancement.
You may still see Valid with warning errors in your GSC account. However, those are in the process of being removed. As a result, I would recommend focusing on Error/Invalid issues only.

Sitebulb
Other tools (e.g., Screaming Frog) can assist with the validation of your current structured markup. However, we’ll stick with our Sitebulb example from above.
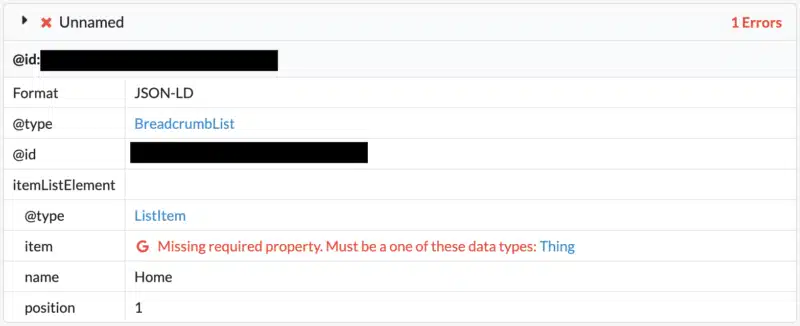
By clicking See Errors, Sitebulb will display the specific validation error and the number of URLs affected.

By clicking through to the URL view and then selecting an individual URL, Sitebulb will nicely display the specific item that is missing or incorrectly formatted.
Schema Markup Validator
Lastly, you can validate your structured data code using the Schema Markup Validator. This tool can be beneficial when diagnosing errors on a specific URL and validating a markup snippet of code before pushing live.
Once you’ve identified and tested for structured data errors, now’s a good time to start compiling your competitive schema gap analysis.
Competitive SERP schema gap analysis
Now the fun part begins!
Before you get started, you’ll need:
- A list of 5-10 priority keyword(s)
- An account at https://tools.sandboxweb.io/serp-analysis-tool (Note* the free version of this tool limits searches to 10/day)
Using these steps, the goal is to identify Schema markup from the entire Page 1 for your priority keyword(s) and then compare that list with the information included vs. the schema inventory you’ve collected above from your site.
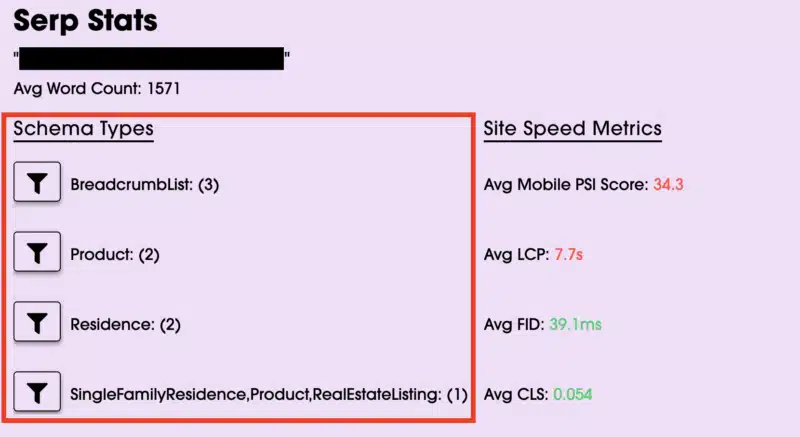
Step 1: Enter a keyword and allow the tool to run. Once completed, all schema types will be nicely aggregated at the top of the page, along with the number of times each is used and some site speed metrics.
Step 2: Under each result, click the </> Schema Types tab and then the validate schema link.

Step 3: For schema types that exist on your site and your competitors, compare the attributes included by reviewing via the validation tool.
Again, the goal here is to identify if there are opportunities to include additional detail in your existing schema markup.
The insights could range from the opportunity to add additional content to the page to simply identifying existing content that is available but not yet included in your page’s markup.
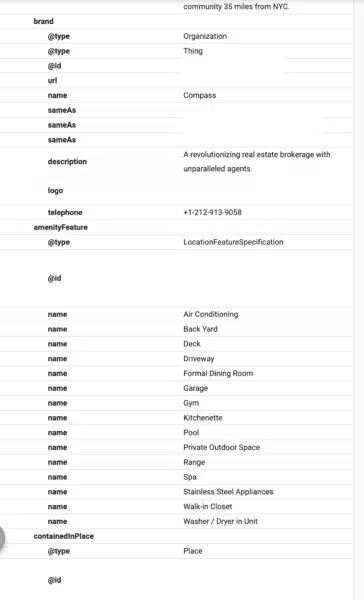
Step 4: If you are not leveraging certain schema types, these are clear opportunities to explore with your development team.
How can you implement schema markup on your website?
There are several ways to generate schema and implement it on your website. Frankly, there is no one-size-fits-all approach depending on your level of access, the size of the site, etc.
However, below, you’ll find a handful of standard tools/approaches we use at my agency.
You can implement schema markup on your website by:
- Using Google’s Structured Data Markup Helper. It’s a simple tool that lets you enter a URL and helps you tag specific elements on the page. The result is a downloadable JSON export that can be added to your site. More information can be found here.
- Don’t have access to add code, Google’s Data Highlighter might be the best option. Similar to the above, with the Data Highlighter, you can “tag” each data field with your mouse, and Google will be able to display this data in search results without adding the code itself. More information can be found here.
- Using a schema generator like this one. These tools help create the markup for you based on your inputs. Once created, the script can be added anywhere in your HTML code’s head or footer section.
- Installing a plugin if you are using WordPress as a CMS platform on your website; there are many plugins available here that will allow you to install Schema Markup easily with just one click!
Think about any schema that you can use
As Google’s understanding of entities and relationships continues to expand and improve, it is only natural that their use of schema types will continue to make their way into search results.
By exploring schema through an audit like this, you can position your site with the best opportunities to take advantage of current and future Google updates.


